
Configuring google chrome on how to use proxies server.it’s a piece a cake like using proxy in Firefox.
Guide to use Proxy in Chrome
Here is the setup to follow to setup Proxy server in Chrome in windows.
- First install the latest version of chrome web browser. After installation open chrome and go to the “Customize and control Google Chrome” button on the toolbar and then select Settings.

- After Click on setting you will redirect yo “chrome://settings/” page in the browser.Where you need to click on a left side Setting tab.
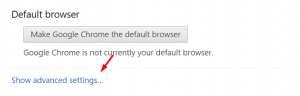
- Next step is to scroll down the page and you will see a Default browser tab under it’s “shows advanced setting”.
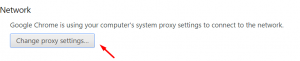
- Scroll further down the list until you see the Network settings, and then click the “Change proxy settings…” button.
- Clicking it let you on the Internet Properties window, where first click top on the Connections tab under it “LAN settings” button.

- In the LAN Settings, uncheck the box that says “Automatically detect settings.” And then, in the Proxy Server section, click the checkbox to enable “Use a proxy server for your LAN…”.

- In Address box insert Proxy and port in Port field. Press the OK button and then press OK again to save your settings.
Now when you surf the web using chrome browser, your ISP ip will be hidden and you will be surfing by using the Proxy Server. If you are not using IP authorization it will ask for user/pass authorization.

To stop using the Proxy Server, repeat the above steps, but uncheck “Use a proxy server for your LAN…” and recheck “Automatically detect settings” in the LAN Settings.
Leave a Reply